So… I’m a geek. No hiding from it. Gone are the days when being a geek mostly meant having the shit beaten out of you in the playground. These days geeks rule the world. So, I’m a geek. I love playing with computers. I love playing with radio. I love playing with electronics. I’m a hacker, in the original sense of the word. That is to say I derive enjoyment from making tools, products, systems do things they weren’t designed to do.
Why? It’s educational, it’s fun, it’s frustrating enough to (sometimes, not always) give a great sense of satisfaction and achievement after solving a problem which has been bugging me for sometimes weeks. It’s inspiring, to learn new tools, to figure out what they’re good at, and what they’re bad at, and to use them to solve problems, more often than not, of my own making.
So I run a VPS (using Linode). I’ve run that VPS since 2008, running every Ubuntu release from 8.04 to 24.04. There I host my own MTA, my own web server for multiple domains, I host websites, databases, dev environments and access endpoints for other people – it’s very handy – and at home I run a homelab.
What’s a homelab? It’s intended for experimentation and learning systems, tools, applications, configurations and all that. All things you can and should learn on your day job, but without the knowledge from first-principles you’ll unlikely find that job int he first place.
Well perhaps my setup isn’t quite a homelab. A large proportion isn’t particularly experimental. A lot of the services I run at home keep me cosplaying as a sysadmin, that’s for sure. If you’re going to do it, you have to do it properly, so here goes:
- I run a highly-available cluster using proxmox
- I run highly-available DNS using unbound which provides some Ad-blocking controls
- I run a Ubiquiti unifi controller and network built around a UDM Pro – easily one of my favourite pieces of networking infrastructure
- I run failover internet lines (Gigaclear FTTH 1Gbps + Talktalk ADSL 70Mbps)
- I run multiple VLANs for LAN, Guest, IoT, Surveillance
- I run a Step-CA certificate authority and use it for SSL certs for all internal services.
- I run a Squid caching-proxy server to (slightly) reduce internet traffic and add further Ad-blocking controls.
- I run a Lancache for game library caching
- I run CCTV/NVR using Frigate
- I run remote access using Tailscale
- I run Ollama, edge-tts
- I run Gitlab source control
- I run n8n for workflow automation, news aggregation, agentic AI, and I’m exploring what else I can do with this.
- I run home assistant for home automation
- I run Observium for monitoring
- I run Wazuh for XDR/SIEM
- I run a reprepro server for deb package distribution
- I run a docker registry for docker image distribution (yes I suppose I could use gitlab for this, but I like keeping it separate)
- I run another internal, satellite postfix MTA which hands off to the VPS
- I run a CUPS airprint spooler – less useful these days than it used to be when half the clients didn’t have the correct printer drivers
- I run nextcloud for DIY cloud storage & sharing
- I run Calibre-web for book/magazine/academic paper library
- I run Plex for home media library, sharing with iPads and Amazon Firesticks
- I’ve just this week installed a local Penpot server to see if it’s useful enough to use instead of Figma
- I run a weewx weather-station
- I run a satellite-weather SDR receiver, driven by “predict“
- I run an ADSB receiver driven by flightaware-1090
- Other devices on the network which aren’t directly in the homelab include things like a trusty DS1819+ Synology, HD Homerun, hamclock, Pi-Star, Echolink node, Allstarlink node, experimental Packet node, NTP server, enviro RPi Pico monitors and a raintrackr, not to mention the family laptops, PCs, TVs, iPads, smartphones, smart plugs, smart lights, NVR cameras, Echos, Google Homes and all that other junk.
- Mostly kept online by an old Dell UPS cast-off from work – PoE Wireless APs to the rescue!
I’m sure I’ve forgotten a bunch of things, but that’s the gist of it. I do not like paying for subscription services if I can avoid it. I’m sure my response of installing everything and running it at home is pretty atypical, but I like being (mostly) in control of my own services.
The experimental side of my homelab actually comes in a different form – that’s the portable kit I take to field events (scouting and similar). That comes with a whole other set of hardware for servicing a mobile LAN but still having local fast file storage, server redundancy, backhaul links, VPN, caching, DNS and similar. That’s for another post.
There was a time when I would have STRONGLY preferred hiring developers and engineers into my teams who do this sort of stuff in their spare time. I’ve interviewed and hired a lot of developers and engineers into my teams over the last quarter century and I often look for the tinkerer in the candidate. I want them to be excited not only about the company or team but about technology itself.
To be honest I still think like that, apparently because I’m some sort of tech dinosaur. It seems learning and experimentation in one’s spare time has fallen out of fashion for a huge proportion of people. I don’t expect to see a stupid amount of github commit history – though that’s often encouraging to see. I know that if you’re working for most companies, that intellectual property is private, commercial, top secret, verboten, and certainly isn’t going on a public repository for a someone else’s AI training.
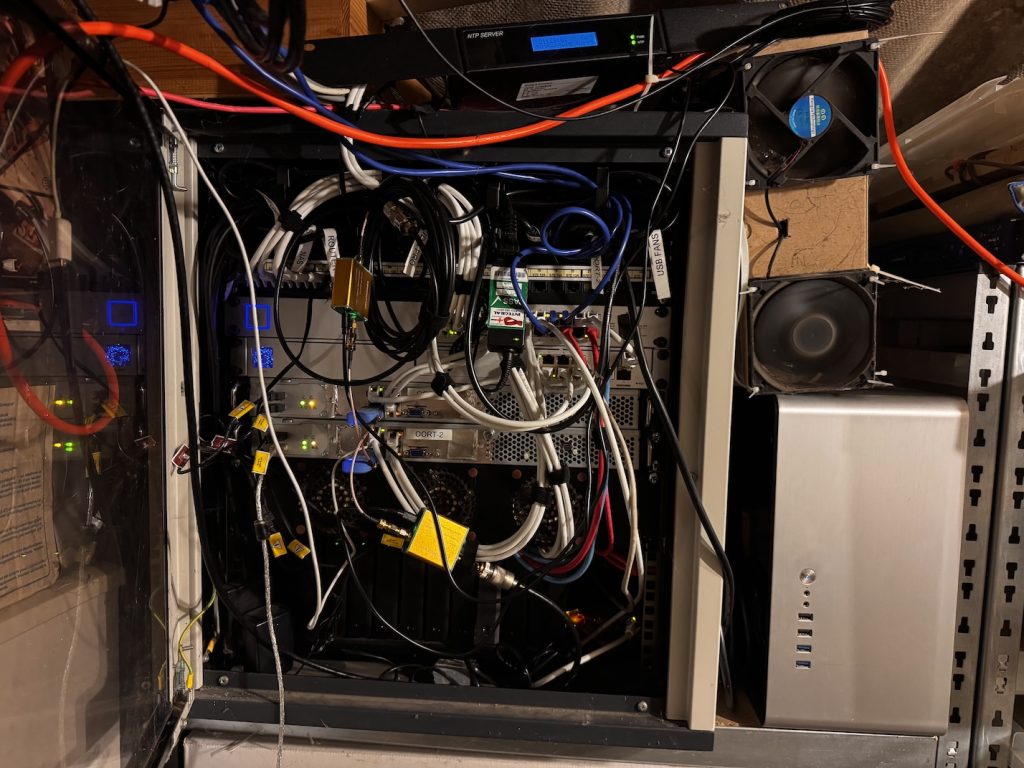
I get it – I was never paid for solving massive, difficult, long-standing system engineering and architecture problems for work in my sleep, which happened on many occasions, as might be expected when working on groundbreaking novel science. It certainly used to piss me off that what little recognition was received was never really proportional to the amount of effort put in either in work, or in overtime, or in own-time. I need to get over that – that’s a very much a “me” problem. In the meantime I need a bigger server cab.
What should I run on my homelab? What do you run on yours?