2016-03-07 Update: Git Repo available
Recently I’ve been involved with building a hardware device consisting of a cluster of low-power PC servers. The boards chosen for this particular project aren’t enterprise or embedded -style boards with specialist features like out of band (power) management (like Dell’s iDRAC or Intel’s AMT) so I started thinking about how to approximate something similar.
It’s also a little reminiscent of STONITH (Shoot The Other Node In The Head), used for aspects of the Linux-HA (High Availability) services.
I dug around in a box of goodies and found a couple of handy parts:
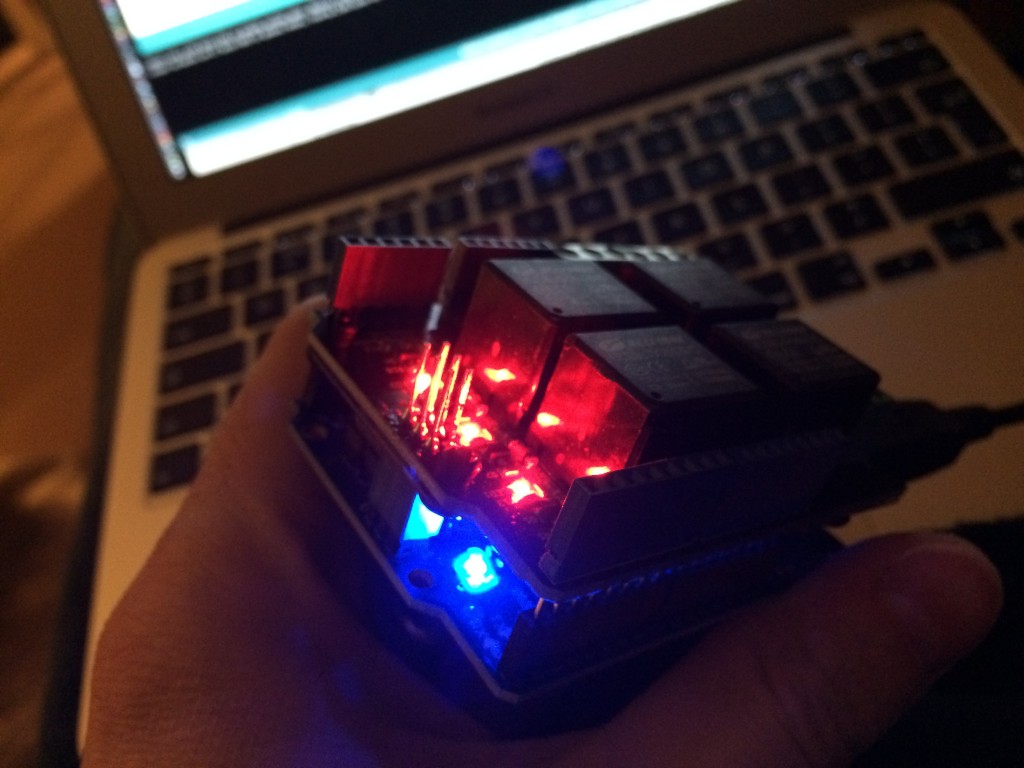
- Arduino Duemilanove
- Seeedstudio Arduino Relay Shield v3
The relays are rated for switching up to 35V at 8A – easily handling the 19V @ 2A for the mini server boards I’m remote managing.
The other handy thing to notice is that the Arduino by its nature is serial-enabled, meaning you can control it very simply using a USB connection to the management system without needing any more shields or adapters.
Lastly it’s worth mentioning that the relays are effectively SPDT switches so have connections for circuit open and closed. In my case this is useful as most of the time I don’t want the relays to be energised, saving power and prolonging the life of the relay.
The example Arduino code below opens a serial port and collects characters in a string variable until a carriage-return (0x0D) before acting, accepting commands “on”, “off” and “reset”. When a command is completed, the code clears the command buffer and flips voltages on the digital pins controlling the relays. Works a treat – all I need to do now is splice the power cables for the cluster compute units and run them through the right connectors on the relay boards. With the draw the cluster nodes pull being well within the specs of the relays it might even be possible to happily run two nodes through each relay.
There’s no reason why this sort of thing couldn’t be used for many other purposes too – home automation or other types of remote management, and could obviously be activated over ethernet, wifi or bluetooth instead of serial – goes without saying for a relay board -duh!
int MotorControl1 = 4;
int MotorControl2 = 5;
int MotorControl3 = 6;
int MotorControl4 = 7;
int incomingByte = 0; // for incoming serial data
String input = ""; // for command message

void action (String cmd) {
  if(cmd == "off") {
    digitalWrite(MotorControl1, HIGH); // NO1 + COM1
    digitalWrite(MotorControl2, HIGH); // NO2 + COM2
    digitalWrite(MotorControl3, HIGH); // NO3 + COM3
    digitalWrite(MotorControl4, HIGH); // NO4 + COM4
    return;
  }

  if(cmd == "on") {
    digitalWrite(MotorControl1, LOW); // NC1 + COM1
    digitalWrite(MotorControl2, LOW); // NC2 + COM2
    digitalWrite(MotorControl3, LOW); // NC3 + COM3
    digitalWrite(MotorControl4, LOW); // NC4 + COM4
    return;
  }

  if(cmd == "reset") {
    action("off");
    delay(1000);
    action("on");
    return;
  }

  Serial.println("unknown action");
}

// the setup routine runs once when you press reset:
void setup() {
  pinMode(MotorControl1, OUTPUT);
  pinMode(MotorControl2, OUTPUT);
  pinMode(MotorControl3, OUTPUT);
  pinMode(MotorControl4, OUTPUT);
  Serial.begin(9600); // opens serial port, sets data rate to 9600 bps
  Serial.println("relay controller v0.1 rmp@psyphi.net actions are on|off|reset");
  input = "";
}

// the loop routine runs over and over again forever:
void loop() {
  if (Serial.available() > 0) {
    incomingByte = Serial.read();

    if(incomingByte == 0x0D) {
      Serial.println("action:" + input);
      action(input);
      input = "";
    } else {
      input.concat(char(incomingByte));
    }
  } else {
    delay(1000); // no need to go crazy
  }
}
 I’m lucky enough to have both a Raspberry Pi “Slice” media player and an Amazon Prime account but it’s not supported right out of the box. Here’s how I was able to set it up today.
