I’ve been excited by e-ink displays for a long while. I leapt on the original, gorgeous reMarkable tablet as soon as it came out and have been a regular user and advocate ever since. I would dearly love to have one or two of theseenormous 42″ e-ink art poster displays on the wall, but that’s for another day.
I’ve also been a long-time customer of Pimoroni and was aware of their range of nifty Inky displays. I recently came across this neat project by @mimireyburn and managed to pick up a 7.3″ Inky Impression after it being on back-order for only a week or two.
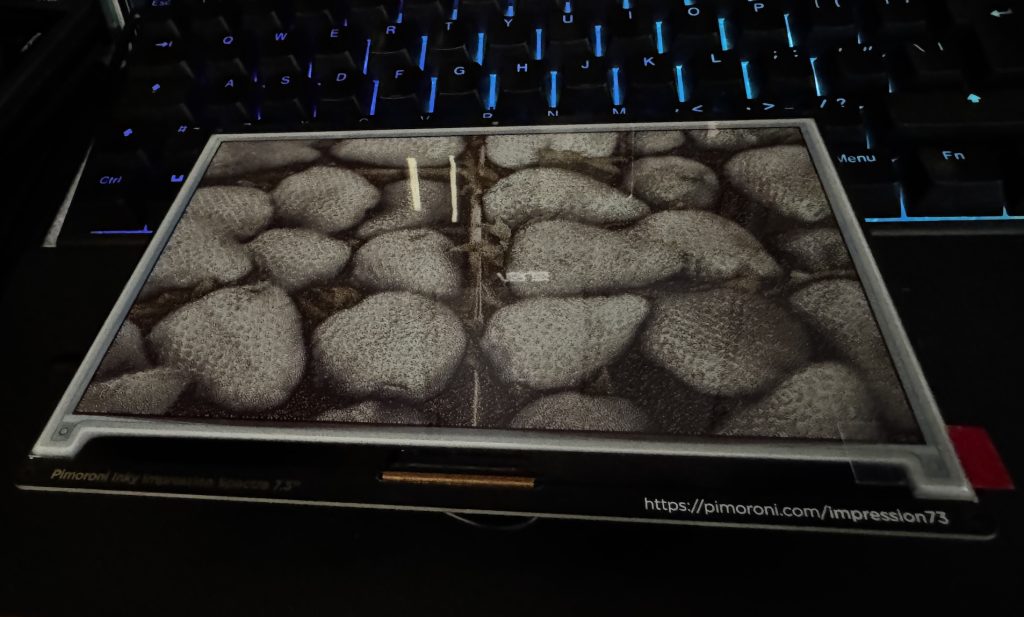
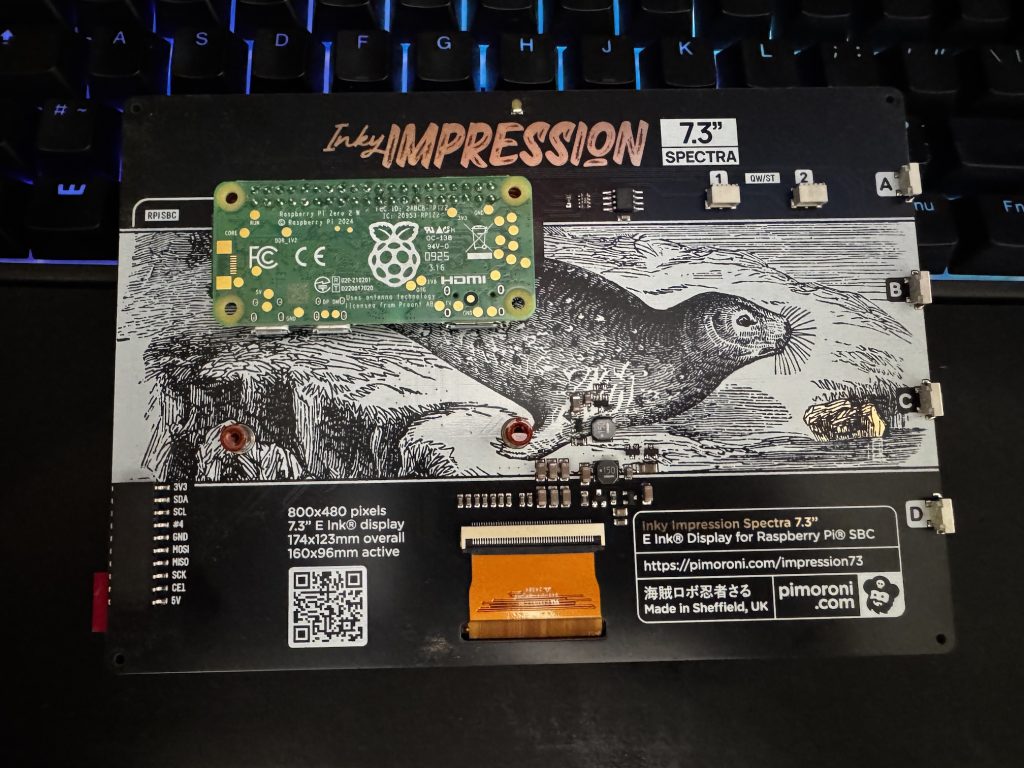
The Inky Impression 7.3″ with protective film and screen reflectionThe Inky Impression 7.3″ rear with mounted Raspberry Pi Zero 2W
After flashing RPi OS on a clean card for the Pi Zero 2W, downloading the project, setting up Python, compilers, virtualenvs, prerequisites, etc. I was presented with a complete failure of the underlying driver and inky library to communicate with the display. This isn’t a fault of the inky-calendar project at all, may I reiterate, but unfortunately a very regular occurrence I’ve found when using many Pimoroni products.
Searching around I tried a few different things, including the usual modifications to boot parameters to enable the drivers/kernel modules and fiddling with permissions, users etc. but with no success. Now I’ve never deliberately pretended to be a Python programmer, nor do I particularly wish to be one, but I’m pretty good with debugging weird stuff and this was definitely presenting as a driver/library issue. Specifically some of the differences with the Inky Impression 7.3 seemed to be tripping things up, and it wasn’t a hole I fancied spelunking in today.
A little more digging highlighted a NodeJS package by @aeroniemi with working Impression 7.3″ display support. I definitely have masqueraded as a JavaScript programmer in the past so things were looking up. Some light Claude.AI vibing and I had two working scripts – one to fetch images from PicSum and another to replicate the calendar fetching+rendering, both from public iCal and authenticated Google Cal sources – awesome!
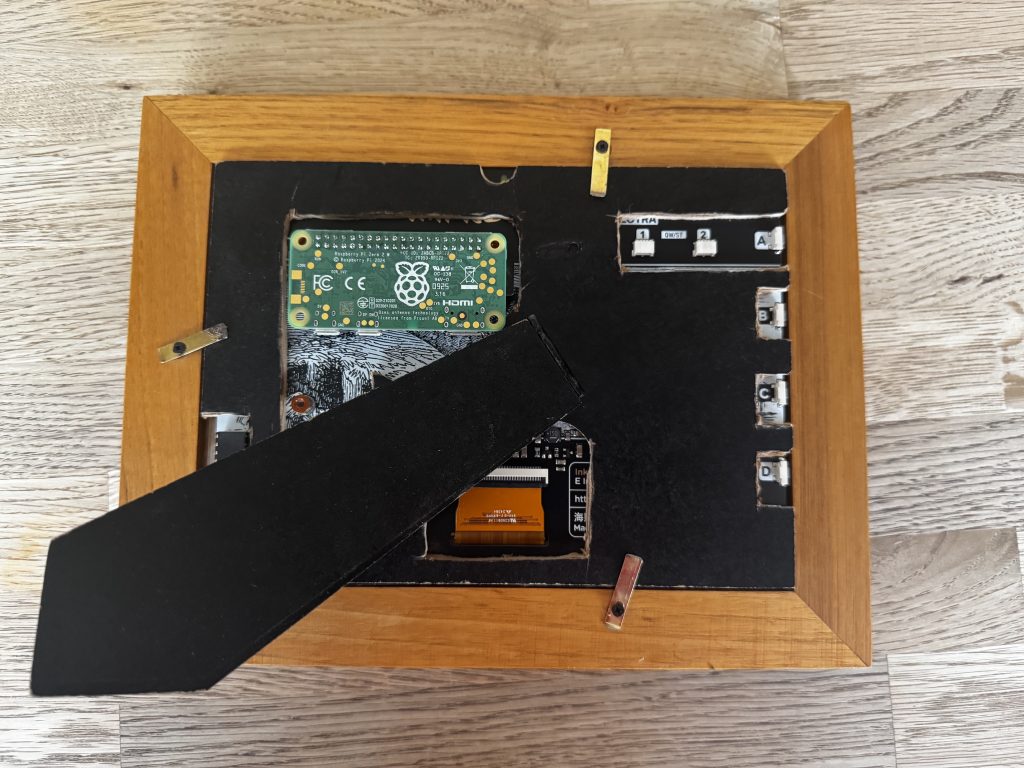
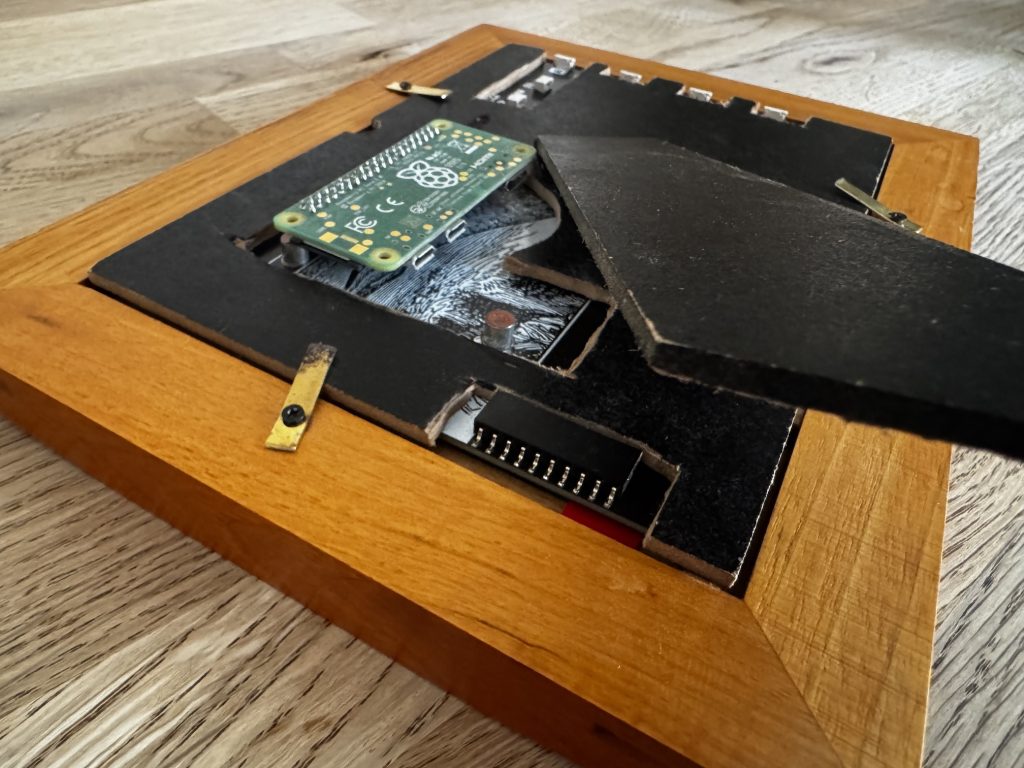
Some dremel butchery on the back panel of an old 7″ picture frame to fit around the sticky-out components on the back of the board and I was in business.
The rear of the photo frame with cut-outs for most of the components on the rear of the displayExtra clearance given to the left-most microUSB power socket on the Pi Zero 2W
Improvements
The only slight drawback with using this NodeJS library is that it only handles the image-display side of things – there’s no built-in support for the function buttons – something to revisit another day.
Another improvement would be to better-handle power – the main benefit of e-ink is that it doesn’t need power once the display has been set, and that’s not being utilised here at all – there’s a cronjob running on the Pi which displays the calendar before 10:00AM and photos after that, refreshing every half-hour.
*/30 6-10 * * * cd /home/frame/ ; node ical2png.js --calendar x --calendar y --google-calendar z --service-account KEY.json --view week ; node main.js --image calendar.png
*/30 10-23 * * * cd /home/frame/ ; node main.js --dither
Lastly, obviously, the display needs to load images from a folder rather than from the internet. That’s super-quick to do, and that’s this afternoon’s job. The calendar-rendering – fonts, sizes, colours etc. could do with a little more spit and polish too.
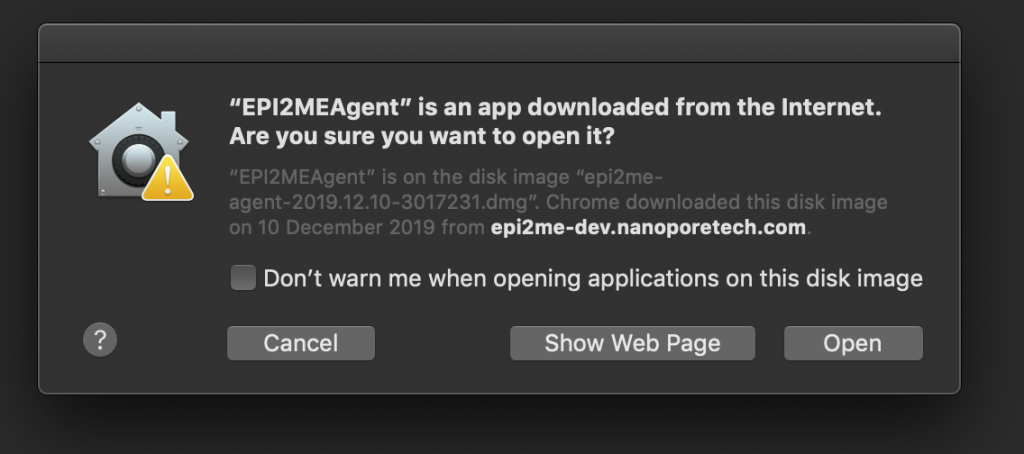
Do you, like me, develop desktop applications for MacOSX? Do you, like me, do it on Linux because it makes for a much cheaper and easier to manage gitlab CI/CD build farm? Do you still sign your apps using a MacOSX machine, or worse (yes, like me), not sign them at all, leaving ugly popups like the one below?
With the impending trustpocalypse next month a lot of third-party (non-app-store) apps for MacOSX are going to start having deeper trust issues than they’ve had previously, no doubt meaning more, uglier popups than that one, or worse, not being able to run at all.
I suspect this trust-tightening issue, whilst arguably a relatively good thing to do to in the war against malware, will adversely affect a huge number of open-source Mac applications where the developer/s wish to provide Mac support for their users but may not wish to pay the annual Apple Developer tax even though it’s still relatively light, or may not even own any Apple hardware (though who knows how they do their integration testing?). In-particular this is likely to affect very many applications built with Electron or NWJS, into which group this post falls.
Well, this week I’ve been looking into this issue for one of the apps I look after, and I’m pleased to say it’s at a stage where I’m comfortable writing something about it. The limitation is that you don’t sidestep paying the Apple Developer tax, as you do still need valid certs with the Apple trust root. But you can sidestep paying for more Apple hardware than you need, i.e. nothing needed in the build farm.
First I should say all of the directions I used came from a 2016 article, here. Thanks very much to Allin Cottrell.
Below is the (slightly-edited) script now forming part of the build pipeline for my app. Hopefully the comments make it fairly self-explanatory. Before you say so, yes I’ve been lazy and haven’t parameterised directory and package names yet.
#!/bin/bash

#########
# This is a nwjs (node) project so fish the version out of package.json
#
VERSION=$(jq -r .version package.json)

#########
# set up the private key for signing, if present
#
rm -f key.pem
if [ "$APPLE_PRIVATE_KEY" != "" ]; then
    echo "$APPLE_PRIVATE_KEY" > key.pem
fi

#########
# temporary build folder/s for package construction
#
rm -rf build
mkdir build && cd build
mkdir -p flat/base.pkg flat/Resources/en.lproj
mkdir -p root/Applications;

#########
# stage the unsigned applicatio into the build folder
#
cp -pR "../dist/EPI2MEAgent/osx64/EPI2MEAgent.app" root/Applications/

#########
# fix a permissions issue which only manifests after following cpio stage
# nw.app seems to be built with owner-read only. no good when packaging as root
#
chmod go+r "root/Applications/EPI2MEAgent.app/Contents/Resources/app.nw"

#########
# pack the application payload
#
( cd root && find . | cpio -o --format odc --owner 0:80 | gzip -c ) > flat/base.pkg/Payload

#########
# calculate a few attributes
#
files=$(find root | wc -l)
bytes=$(du -b -s root | awk '{print $1}')
kbytes=$(( $bytes / 1000 ))

#########
# template the Installer PackageInfo
#
cat <<EOT > flat/base.pkg/PackageInfo
<pkg-info format-version="2" identifier="com.metrichor.agent.base.pkg" version="$VERSION" install-location="/" auth="root">
  <payload installKBytes="$kbytes" numberOfFiles="$files"/>
  <scripts>
    <postinstall file="./postinstall"/>
  </scripts>
  <bundle-version>
    <bundle id="com.metrichor.agent" CFBundleIdentifier="com.nw-builder.epimeagent" path="./Applications/EPI2MEAgent.app" CFBundleVersion="$VERSION"/>
  </bundle-version>
</pkg-info>
EOT

#########
# configure the optional post-install script with a popup dialog
#
mkdir -p scripts
cat <<EOT > scripts/postinstall
#!/bin/bash

osascript -e 'tell app "Finder" to activate'
osascript -e 'tell app "Finder" to display dialog "To get the most of EPI2ME please also explore the Nanopore Community https://community.nanoporetech.com/ ."'
EOT

chmod +x scripts/postinstall

#########
# pack the postinstall payload
#
( cd scripts && find . | cpio -o --format odc --owner 0:80 | gzip -c ) > flat/base.pkg/Scripts
mkbom -u 0 -g 80 root flat/base.pkg/Bom

#########
# Template the flat-package Distribution file together with a MacOS version check
#
cat <<EOT > flat/Distribution
<?xml version="1.0" encoding="utf-8"?>
<installer-script minSpecVersion="1.000000" authoringTool="com.apple.PackageMaker" authoringToolVersion="3.0.3" authoringToolBuild="174">
    <title>EPI2MEAgent $VERSION</title>
    <options customize="never" allow-external-scripts="no"/>
    <domains enable_anywhere="true"/>
    <installation-check script="pm_install_check();"/>
    <script>
function pm_install_check() {
  if(!(system.compareVersions(system.version.ProductVersion,'10.12') >= 0)) {
    my.result.title = 'Failure';
    my.result.message = 'You need at least Mac OS X 10.12 to install EPI2MEAgent.';
    my.result.type = 'Fatal';
    return false;
  }
  return true;
}
    </script>
    <choices-outline>
        <line choice="choice1"/>
    </choices-outline>
    <choice id="choice1" title="base">
        <pkg-ref id="com.metrichor.agent.base.pkg"/>
    </choice>
    <pkg-ref id="com.metrichor.agent.base.pkg" installKBytes="$kbytes" version="$VERSION" auth="Root">#base.pkg</pkg-ref>
</installer-script>
EOT

#########
# pack the Installer
#
( cd flat && xar --compression none -cf "../EPI2MEAgent $VERSION Installer.pkg" * )

#########
# check if we have a key for signing
#
if [ ! -f ../key.pem ]; then
    echo "not signing"
    exit
fi

#########
# calculate attribute
: | openssl dgst -sign ../key.pem -binary | wc -c > siglen.txt

#########
# xar the Installer package
#
xar --sign -f "EPI2MEAgent $VERSION Installer.pkg" \
    --digestinfo-to-sign digestinfo.dat --sig-size $(cat siglen.txt) \
    --cert-loc ../dist/tools/mac/certs/cert00 --cert-loc ../dist/tools/mac/certs/cert01 --cert-loc ../dist/tools/mac/certs/cert02

#########
# construct the signature
#
openssl rsautl -sign -inkey ../key.pem -in digestinfo.dat \
        -out signature.dat

#########
# add the signature to the installer
#
xar --inject-sig signature.dat -f "EPI2MEAgent $VERSION Installer.pkg"

#########
# clean up
#
rm -f signature.dat digestinfo.dat siglen.txt key.pem
With all that you still need a few assets. I built and published (internally) corresponding debs for xar v1.6.1 and bomutils 0.2. You might want to compile & install those from source – they’re pretty straightforward builds.
Next, you need a signing identity. I used XCode (Preferences => Accounts => Apple ID => Manage Certificates) to add a new Mac Installer Distribution certificate. Then used that to sign my .app once on MacOS in order to fish out the Apple cert chain (there are probably better ways to do this)
I set this up the contents of key.pem as a gitlab CI/CD Environment Variable APPLE_PRIVATE_KEY so it’s never committed to the project source tree.
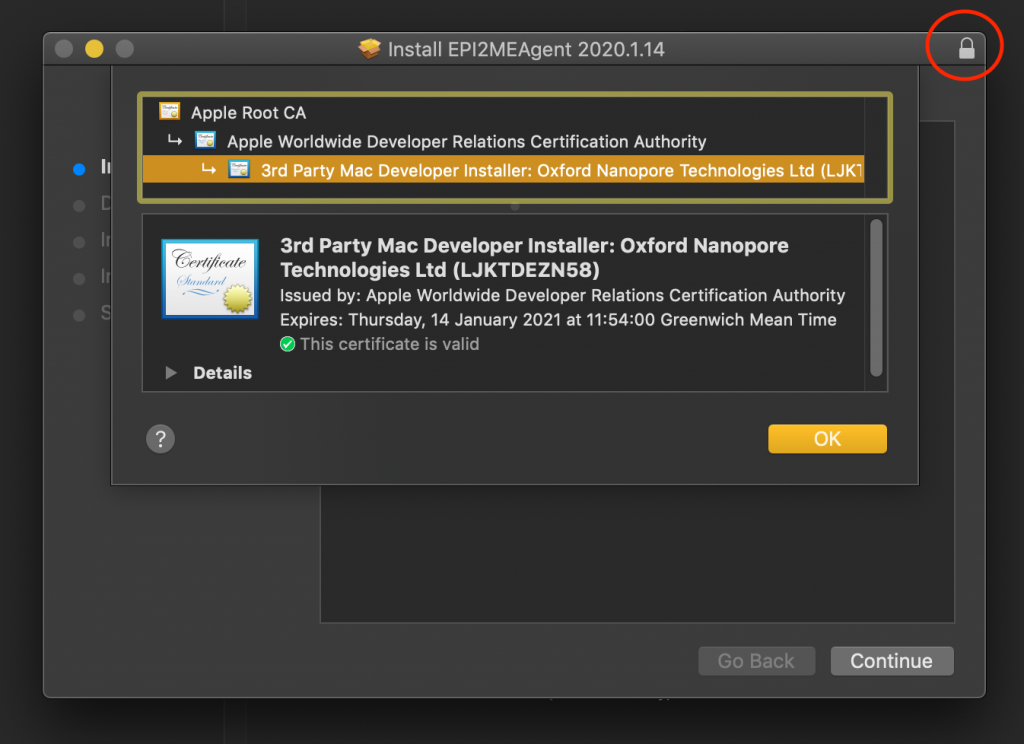
Once all that’s in place it should be possible to run the script (paths-permitting, obviously yours will be different) and end up with an installer looking something like this. Look for the closed padlock in the top-right, and the fully validated chain of certificate trust.
In conclusion, the cross-platform application nwjs builds (Mac, Windows, Linux) all run using nw-builder on ubuntu:18.04, and the Mac (and Windows, using osslsigncode, maybe more on that later) also all run on ubuntu:18.04. Meaning one docker image for the Linux-based Gitlab CI/CD build farm. Nice!
At work, I have a CLI tool I’ve been working on. It talks to the web and is used by customers all over the planet, some of them on networks with tighter restrictions than my own. Often those customers have an HTTP proxy of some sort and that means the CLI application needs to negotiate with it differently than it would directly with a web server.
So I need to test it somehow with a proxy environment. Installing a proxy service like Squid doesn’t sound like too big a deal but it needs to run in several configurations, at a very minimum these three:
no-proxy
authenticating HTTP proxy
non-authenticating HTTP proxy
I’m going to ignore HTTPS proxy for now as it’s not actually a common configuration for customers but I reckon it’s possible to do with mkcert or LetsEncrypt without too much work.
There are two other useful pieces of information to cover, firstly I use GitLab-CI to run the CI/CD test stages for the three proxy configurations in parallel. Secondly, and this is important, I must make sure that, once the test Squid proxy service is running, the web requests in the test only pass through the proxy and do not leak out of the GitLab runner. I can do this by using a really neat Linux feature called IP namespaces.
IP namespaces allow me to set up different network environments on the same machine, similar to IP subnets or AWS security groups. Then I can launch specific processes in those namespaces and network access from those processes will be limited by the configuration of the network namespace. That is to say, the Squid proxy can have full access but the test process can only talk to the proxy. Cool, right?
The GitLab CI/CD YAML looks like this (edited to protect the innocent)
.network_ns: &network_ns | ip netns add $namespace ip link add v-eth1 type veth peer name v-peer1 ip link set v-peer1 netns $namespace ip addr add 192.168.254.1/30 dev v-eth1 ip link set v-eth1 up ip netns exec $namespace ip addr add 192.168.254.2/30 dev v-peer1 ip netns exec $namespace ip link set v-peer1 up ip netns exec $namespace ip link set lo up ip netns exec $namespace ip route add default via 192.168.254.1
So there are five blocks here, with three stages and two common script blocks. The first common script block installs iproute2 which gives us the ip command.
The second script block is where the magic happens. It configures a virtual, routed subnet in the parameterised $namespace.
Following that we have the three test stages corresponding to the three proxy (or not) configurations I listed earlier. Two of them install Squid, one of those creates a test user for authenticating with the proxy. They all run the test script, which in this case is test/end2end/cli. When those three configs are modularised and out like this with the common net namespace script as well it provides a good deal of clarity to the test maintainer. I like it a lot.
So then the last remaining things are the respective squid configurations: proxyauth and proxynoauth. There’s a little bit more junk in these than there needs to be as they’re taken from the stock examples, but they look something like this:
http_access allow authenticated http_access deny all http_port 3128
And there you have it – network-restricted proxy testing with different proxy configurations. It’s the first time I’ve used ip net ns without being wrapped up in Docker, LXC, containerd or some other libvirt thing, but the feeling of power from my new-found network-god skills is quite something :)
Be aware that you might need to choose different subnet ranges if your regular LAN conflicts. Please let me know in the comments if you find this useful or if you had to modify things to work in your environment.
Yesterday I upgraded my XBMC media centre, an Acer (bleugh!) Revo 3610 from Ubuntu 10.10 to 11.10 (Oneric Ocelot).
The upgrade itself went fine but (re)installed a few things I’d previously removed, things I didn’t want and things which break a few XBMC features. This is what I had to do to reset things:
Reset the xbmc user’s login session to ‘custom session’ using the gear icon on the top-right of the login window
Reset network settings (e.g. /etc/resolv.conf) if you made the mistake of logging in, resulting in NetworkManager resetting everything
Check your xbmc user is still in the ‘audio’ group
apt-add-repository ppa:ubuntu-x-swat/x-updates
apt-get update
apt-get install nvidia-current # if you hadn’t previously done this
apt-get dist-upgrade
apt-get autoremove
It’s probably worth saying I use plain stereo output from the headphone jack, and a Grand Hand III VGA adapter rather than HDMI because my TV is about 9 years old.